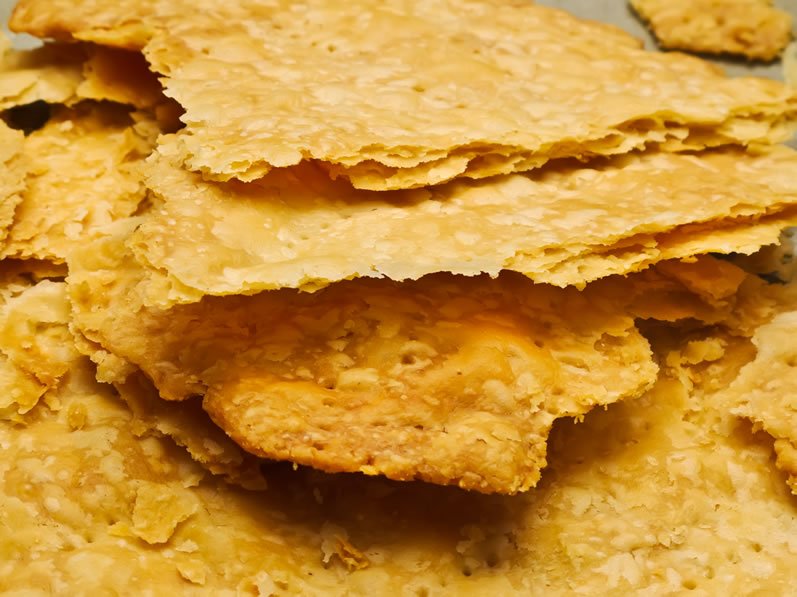
There’s nothing easier than making a tender, flaky pastry crust. For some reason though, the very word “pastry” evokes shudders from otherwise competent cooks. It seems that everyone has, at one time or another, had difficulty with this basic dough.
There’s nothing easier than making a tender, flaky pastry crust. For some reason though, the very word “pastry” evokes shudders from otherwise competent cooks. It seems that everyone has, at one time or another, had difficulty with this basic dough. To take some of the mystery out of it, and hopefully some of the fear as well, here’s a run-down on what actually happens in the pastry making process.
There are only a few ingredients to consider; typically just flour, fat, and water—and perhaps a little salt or sugar. The flour is first mixed with the butter in a procedure called “sabler”–which means to reduce to sand. The object here is to coat tiny particles of flour with tiny particles of butter, which makes the combination look something like coarse cornmeal.
As it turns out, however, the size and shape of the butter particles make a big difference in the flakiness of the pastry: The smaller and rounder the butter granules, the less flaky the pastry. For the flakiest pastry possible, the butter must be rolled paper-thin with the flour and maintained that way in the finished dough. I call that pastry, Super Flaky, All Butter, Short-Crust Pastry, and we’ll cover it in a later post. This easy pastry is so flaky and melt-in-the-mouth scrumptious, that you may never need the flakier version.
Regardless of the size and shape of the butter particles, however, the sabler process is important to the final outcome of the crust because the butter shields a critical portion of the flour particles from the liquid that will be added next, and by so doing prevents the gluten within that portion of flour from becoming activated. (Later on, the same butter prevents the activated portion of the gluten from producing long connective strands.)
The overdevelopment of gluten–the elastic network of proteins contained within the flour–is what makes pastry tough and is a common cause of unsuccessful pastry. Besides liquid, warmth and manipulation also encourage the development of gluten and should thus be minimized as much as possible.
Next, a small amount of ice-cold liquid is added, activating the unprotected (unbuttered) gluten proteins in the flour, giving the dough enough cohesiveness to roll out easily. (If too much liquid is used, no amount of butter can prevent it from being absorbed by the flour, producing a tight network of gluten threads that will spell disaster for the pastry. If too little liquid is used, the dough will not hold its shape during rolling; it will be dry and crumbly, and will tear easily once rolled.)
Lastly, the dough is gathered quickly into a ball, flattened, encased in plastic wrap, and refrigerated to set the butter and relax the gluten. Except for double-crust or lattice-top pies, turnovers, casings for pates, and so on, Short-Crust Pastry should be partially or fully prebaked, so that it won’t absorb a wet filling as readily. Because of the high butter content of this pastry, prebaked crusts need to be “baked blind” which helps to keep the sides from collapsing before they set.
There you have it in a nutshell. Nothing terribly difficult; just an easy process with few simple precautions. Here then is the basic recipe with a few more details.
Quick & Easy, Flaky, All Butter, Short-Crust Pastry + 5 Variations
Although I sometimes spend a little more time building layers of paper-thin butter into my short-crust pastry dough (resulting in an extremely flaky pastry), the following method can’t be beat for ease and speed. The results are superb.
Unlike a processor, which reduces the butter to minuscule particles, a mixer creates little oatmeal-size shards, which are much better when it comes to separating the layers of dough during baking. In other words, if you use a mixer in the way proscribed here, you will get significantly flakier dough than if you use a processor.
As long as you are at it, I recommend making several disks of dough at once and freezing what you don’t need. I often triple or quadruple this recipe, because I love having pastry dough ready to go in the freezer. It takes about 45 minutes to thaw at room temperature.
This dough is about as high in butter content as you can go with a pastry prepared in this manner. An acceptable short-crust pastry can be made with as little as 5½ tablespoons of butter per cup of flour, rather than the 8 tablespoons specified here.
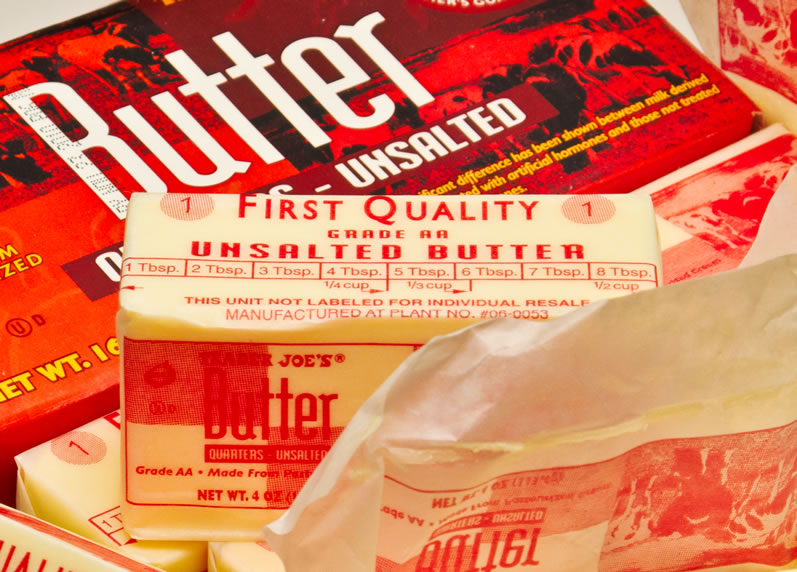
½ cup unsalted butter, cut into 8 pieces, very cold
1 cup King Arthur unbleached, all-purpose flour
½ teaspoon fine sea salt
3 tablespoons ice water, approximately
- In the cold bowl of a stand mixer fitted with the paddle attachment, add the butter, flour, and salt. Mix on slow speed just until the butter bits are about the size of oatmeal.
- With the mixer running, slowly drizzle in just enough of the water to moisten the dough enough so that it forms a ball. With the mixer off, check the wetness of the dough with your fingers. Add a little more water if necessary to achieve a dough that will hold together.
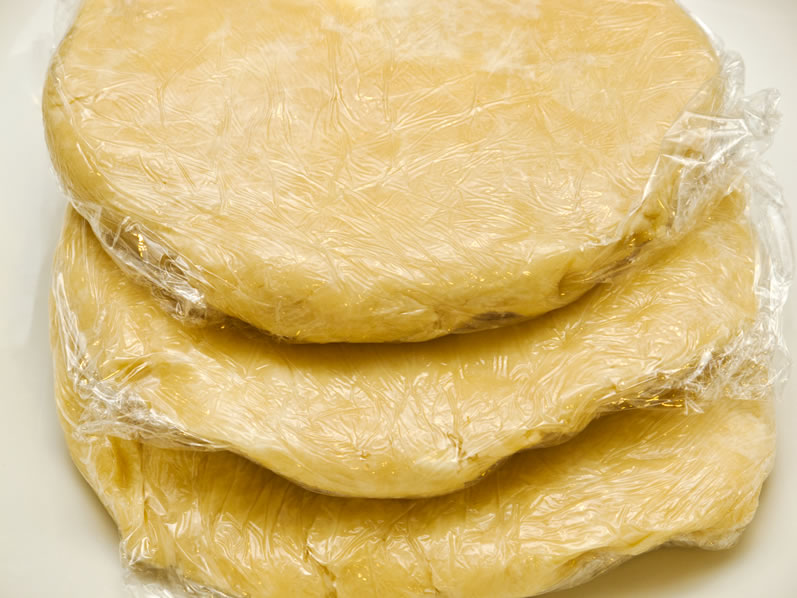
- Remove the dough from the bowl, gather the dough together with your hands and flatten it into a disk. Enclose in plastic wrap and refrigerate for at least 2 hours to allow the butter to firm and the gluten to relax. (This dough may also be frozen.)
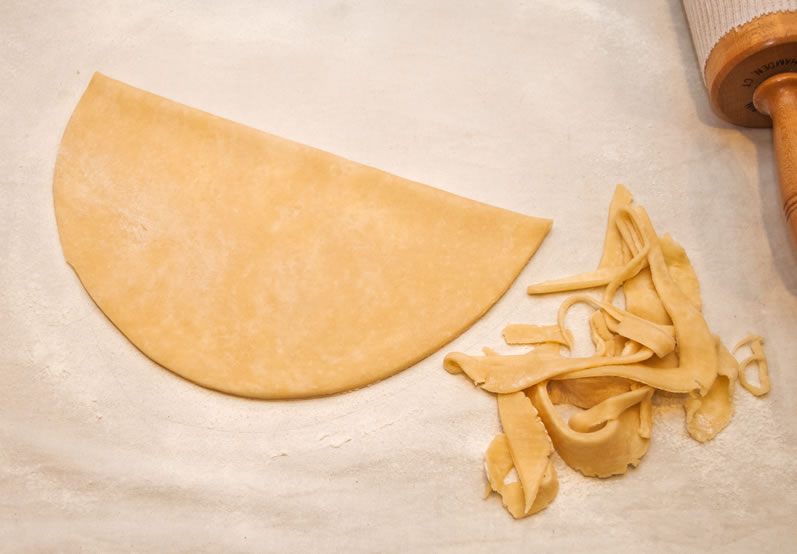
- Using a rolling pin fitted with a floured pastry sleeve, roll dough out on a floured board, countertop, or pastry cloth to the desired thickness—1/8- to ¼-inch thick.
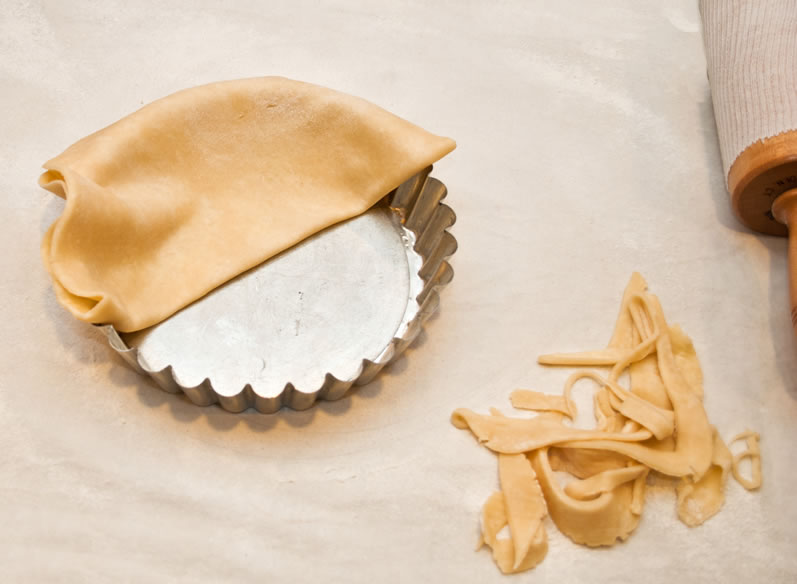
- Using a sharp knife, cut around the outside of the pastry to remove the jagged edges. (If left as is, these will cause the pastry to tear when you pick it up.) With a soft brush remove any excess flour from the pastry.
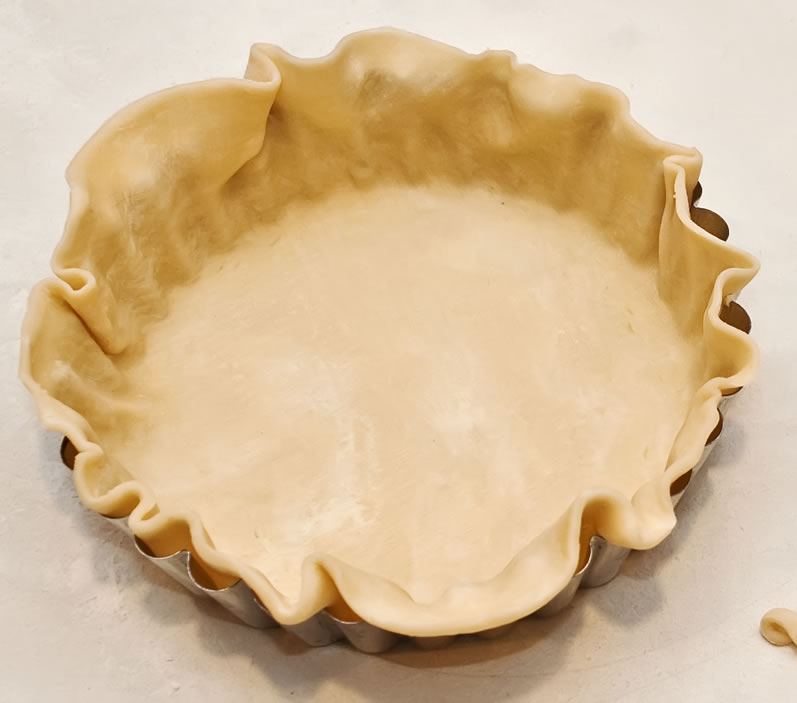
- Fold the pastry in half and carefully position it over a tart pan (no need to butter the pan). Unfold, carefully easing the pastry into the corners of the tart pan. Pat in place, and cut the pastry evenly ½-inch bigger all around than the diameter of the pan. Fold this extra ½-inch to the outside and press against the outside body of the pastry. This should give you a reinforced edge, a little higher than the sides of the pan, with which to work.
- For a fancy fluted edge, crimp the pastry between the thumb and forefinger of one hand and the forefinger of the other, evenly all the way around. For a more delicate edge that won’t get left behind on your guest’s plates, push the reinforced edge down just a bit and trim off the excess even with the edge of the tart pan. Now use your fingers to push the edge back up a little so that it follows the natural convolutions of the pan and extends a 1/4-inch or so higher than the pan edge.
- Refrigerate for at least 2 hours to reset the butter, relax the gluten, and firm up the pastry so that it won’t bend out of shape when the liner is inserted.
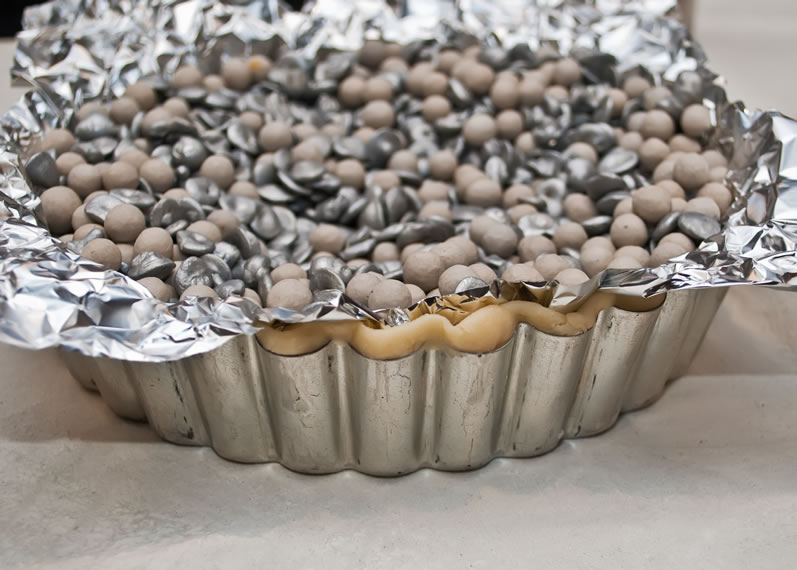
- To prebake the shell, line the pastry carefully with foil (following the side curves) and fill the liner to the halfway mark with aluminum pie weights or dried beans (these may be used again and again indefinitely).
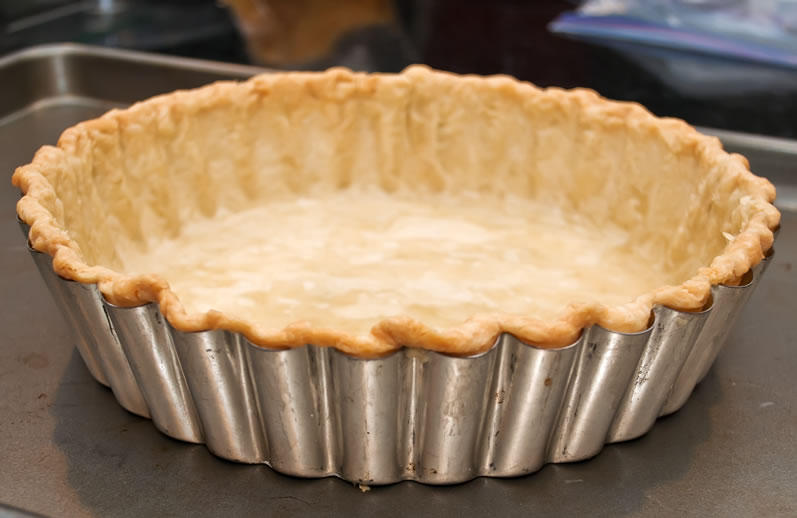
- Bake at 425º for 10-20 minutes, remove the liner with the pie weights (also called a “blind”), and continue baking for 4 minutes for a partially baked crust or for 10 minutes for a fully baked crust. The bottom should be totally set and the pastry beginning to color nicely in the latter instance.
- Remove from the oven and cool on a wire rack.
Makes just enough dough for a 9-inch, shallow, removable-bottom tart pan or regular depth pie pan.
A triple batch makes about 1 pound 14 ounces dough, or 10 ounces dough for each of 3 pastries.
NOTE: Increase by half-recipe increments for larger tart pans.
Variations
Sweet Short-Crust Pastry
Proceed as in the basic short-crust recipe, but add 1-4 tablespoons finely granulated or powdered sugar to the flour. Decrease the water just slightly.
Note The more sugar you add, the more difficult the pastry will be to roll out. Don’t try to roll it too thin.
Very Short Short-Crust Pastry
For folks who hate to roll out pie crusts, this makes a very crumbly, melt-in-your-mouth pastry shell with no rolling required. Use only a little or no water to bind the pastry. Sprinkle the bits of non-cohesive dough onto the tart pan and press into place with your fingertips, making sure to get the sides and bottom as even in thickness as possible. Work quickly and don’t overwork. Cut off level with the edge of the tart pan.
Short-Crust Pastry with Ground Nuts
Replace ¼ cup of the flour with an equal amount of finely ground (but not oily) nuts. Use hazelnuts, walnuts, pecans, almonds, macadamia nuts, pine nuts, or even peanuts.
Short-Crust Pastry with Cheese
Add ¼-½ cup medium to hard grated cheese or combination of cheeses to the flour and continue as in the basic recipe.
Alternate Grain Short-Crust Pastry
Replace ¼-½ cup of the wheat flour with another grain flour, meal, or the like—cornmeal, whole wheat flour, rye flour, or wheat germ.
Copyright 2010-2020 Susan S. Bradley. All rights reserved.

Hi Susan, thank you so much for this piece the tips are really useful! I love pastry and am always trying to perfect mine! I’m going to try making some tonight incorporating your tips and ideas!
With regards to the recipe itself, would you be able to advice on the amount of butter and flour in grams?
Many thanks in advance!
Natalie
Thanks Natalie!
Here are the conversions you request:
1/2 cup butter = 4 ounces = 113.4 grams
1 cup flour = 4.5 ounces = 125 grams
However, you don’t need this level of precision with pastry. You’ll learn to feel the correct moisture level in the dough. Just takes a little practice. Happy baking!!
Currently it seems like WordPress is the best blogging platform available right
now. (from what I’ve read) Is that what you are using on your blog?
Yes, WordPress is a great blog platform. Highly recommend…
Absolutely the best pastry I’ve ever made! The stand mixer method makes it so easy to turn out outstanding flaky pastry! Thank you for a winner! Love your blog. Just made your umami pesto yesterday…another winner!!!!!
Thank you, Joanna, you’ve made my day.
I’ve been using the food processor or my pastry blender to cut in the butter but have never used my stand mixer. I’ve always been afraid it would mix the dough rather than cut the butter into the flour. I used to use my hand held Kitchen Aid mixer because the beaters were thinner wires and I thought it probably better than the paddle or thick tines that are used in other hand mixers. It worked okay, but the low speed is still too fast to control to keep the dough from getting too fine in texture. Currently I use the fraisage method to work the dough once the liquid has been incorporated and it has really helped to get he dough to a cohesive consistancy as well as produce a very flakey pastry. What is your opinion of this method of working the dough?
Susan, the stand mixer method put me off as well for the longest time. When I finally tried it, I was amazed at the difference. The processor cuts the butter too fine. The fraisage method works well if done properly. However, you will get even more incredible flakiness if you do it BEFORE you add any liquid. Rather than use the heel of my hand for this, I use a heavy rolling pin. The objective it to create extremely thin “sheets” of butter encased in flour. This is what creates the flakiness when the butter melts and leaves air space between the layers of dough. I think of it as a quick and easy puff pastry-like technique. The bottom line though is keep doing what is working for you. Have a wonderful Thanksgiving! …Susan
I especially like this because I have a tiny food processor which is not fun for pastry.
This will get me a step closer to doing it by hand the way my Mom and Grandma did so perfectly. Thank You!
I used a food processor with my first attempt. I’ll try your method with my mixer next. Love all the variations you’ve provided.
Amnah, I taught the processor method for pastry for decades, and the pastry was very buttery but never flaky like I wanted. So I kept seaching for the answer and testing every formula I could get my hands on. The mixer method is light years ahead for flakiness.
I used this recipe for the tart I’m making for dinner tonight. I made mini tarts in the toaster oven to see how they would come out while the larger one is currently baking in the oven.
They are delicious! You’re completely right about the pastry being flakier by using the stand mixer. I can’t believe how easy it is to make this crust. Thank you so much for your detailed explinations and wonderful recipes.
Amnah, you are most welcome. It brings me joy to know this turned out so well for you. Thank you for letting me know.
Ooooh I like this! And I also like the ease of making it. Thanks for this post Susan! NICE!
Deeba, thank you! Do try it and let me know what you think. I made Spicy Apple Turnovers the other night using this flaky pastry for half and my super flaky pastry for half. Both were superb. Best pastries I’ve ever made or eaten.
I can’t wait to try this! Can you clarify the rolling out part in steps 4 and 6? I’m not sure what the difference is.
Stacey, there was an extra step in the procedure. Please take a look now. Thanks! …Susan